 I have been so overwhelmed with all the lovely responses to my blog posts as well as the new followers. So as a little thank you, I thought I would give all of you a pattern to this napkin ring. Now you would think this would have been easy, but not as easy as I thought. My nephew came over last night and showed me how to make a PDF file. I'd never made one. The good news about that was that we were successful and I learned something new. The bad news was that I found out that a PDF file cannot be attached to this blog. So, since there's always more than one way to do anything, we had to think of another way to get the file to any of you who might like to have it. We came up with the "old fashioned" way, email. If you would like the pattern to this napkin ring, email me at sewbussted@yahoo.com and I will be happy to send out a copy.
The napkin ring adds a nice touch to a place setting. They're quick and inexpensive to make and they also make a great little hostess gift.

There are just 3 pieces to the pattern, the ring portion, the leaves, and the petals.

The ring portion looks like a dog bone. The rounded pieces at each end are also a part of the flower section.
To put everything together, fold the napkin ring portion in half. Pinch together the rounded ends and slide the leaf portion over the pinched portion.

Then slide the petal piece over the pinched portion.
 Arrange the petals as you would like.
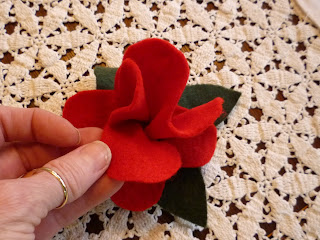 When you have a pretty holiday table, you need a pretty holiday outfit. I could wear the jacket at other times during the year, but it just seems a little more special to save it for the holidays.
 This jacket is made from a wool double knit.
 The entire jacket is embroidered in crewel work. The yarn is wool.
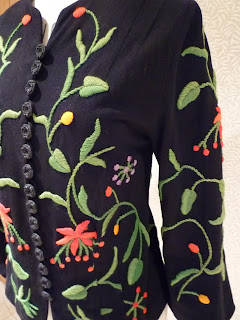
The buttons are glass, a little heavy, but I love the way they look and I also like how they lay agaist the wool.
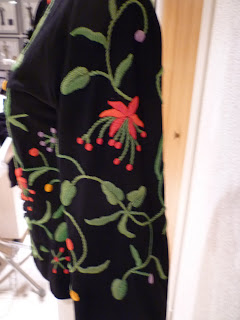 A view of the sleeve.
The jacket is not lined. I rather like that you can see that it was actually done by hand.
And now for my little surprise. I am finally just about ready to put my patterns on the market. In the beginning they will be sold through either me directly or through Etsy. The jacket that I have just shared with you will also be in my pattern line. I plan to have the first patterns out right after the first of the year. I'm so excited. The first pattern will be a great little jacket. I will be showing that to you soon.
So from my little family to yours, have a lovely holiday season.

Carl, Rhonda, Gracie and Little Bit!
Check out the collars on the dogs. Not only are they red and white, they have bells attached. I call them the Jingle Jangle Girls. I'm so cruel.


 I left off the pockets as I felt that they would be just too much. The plaid is quite strong, so to give it a little interest, I used some velvet piping that I had to trim the neckline, front opening seams and the edge of the sleeves. The sleeves seemed to just end, so to give them some interest, I added the ruffle.
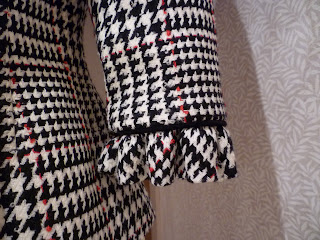
 Now as fate would have it, I didn't start on the jacket until the day before I was to wear it. We were having our Christmas party the following day and we were to wear our plaid garments. Since I was president, I felt that I should lead by example, so I needed to get the jacket finished. Everything went smoothly until it came to the buttons. Even with my large collection of buttons, nothing was just right. By this time, it was well into the evening, stores were closed. What to do, what to do? I came across some piping that I had braided together, an epiphany! The colors were perfect, red, black and white. I decided to tie the braids into chinese knots to make my buttons. Now chinese knots take quite a bit of length, more than I realized as I began to tie the braid into buttons. At this point I had four buttons, but I needed six. The reason I had the braided piping was I had used it as straps on a summer dress. So what do you do at midnight when you're desperate? You go and cut the straps off the summer dress. I just love how the buttons look on the jacket. I couldn't have planned it better. Besides, I wouldn't be wearing the summer dress for quite a while and I could always make more straps.
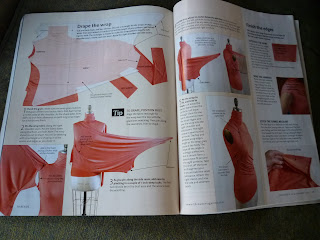
 Now the final part of the story. I had a beautiful piece of black embroidered chiffon that would look great as a skirt with this jacket. All I had to do was cut the piece in half, sew the two halves together, put in an elastic waistband and finish the edge for the hem. Very easy, very fast. In fact I didn't even have to finish the seam edges as the selvage was so nice that when I sewed the seams together, it actually looked like a french seam. The next morning I threw the skirt in the dryer with a fabric softener sheet in order to get out some of the static. I had not had a lot of sleep the night before and was in a bit of a hurry as I dressed. It wasn't until that evening when I got back home that I realized that I had worn my skirt wrong side out the entire day!


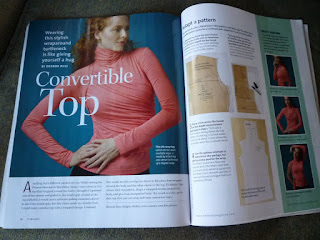
 I think it was in October that I received another email from Judy and attached was the article. I couldn't believe my eyes, so beautiful. The layout was so much more than I ever expected.
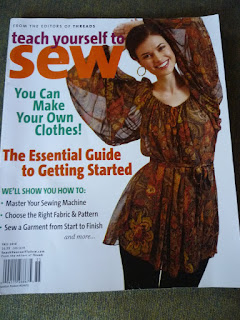 If you receive emails from Threads magazine, I'm sure you have seen that Judy has been working on a series called, Teach Yourself To Sew. I've been following along since the beginning. I have a passion for people learning to sew. For those who don't sew, they just don't know what they are missing. Sewing can open your world to so many new and incredible possibilities. The series is now a new magazine. Now, as if things weren't mind boggling enough for me, Judy asked if she could put my picture in the new magazine along with a short paragraph about myself. When I received the magazine, the picture was huge. WOW! Funny thing about this photo, this was the beginning of the worst flight I've ever had. I picked up 6 puppies in Branson, MO. The turbulance was the worst I've ever experienced. I bounced all over the sky for 3 1/2 hours on my way back to Chicago. The puppies did everything in the crates, but they didn't do anything that I didn't feel like doing. I felt so sorry for them. Hopefully they are now running happily in the fields of Wisconsin and living in loving homes.
 So, fairy godmothers do exist. The entire experience has been one of the most incredible experiences of my life. Friends have been so happy for me. Friends who don't sew have sought out and purchased the magazine. Such a lovely way to end the year.
  In my last post I wrote about the fact that I post more blogs about my flying than I do the actual creative things I do. I am trying to do a better job of getting my pictures posted. This next week, I have a goal to post something each and every day. It's a goal, I'll do my best.
 The yoke of the skirt is a normal yoke. Attached to it are eight panels. Each panel forms a box pleat at the yoke.


 The zipper is sewn into the princessline seam on the left front and then into the opening edge on the right side. My plaids are not matched perfectly, but they aren't bad. It was a bit of a pain in the neck to get the plaids matched so that once it was zipped it would look passable. All in all I was happy with the outcome.
